Introduction
In today’s interconnected world, internet connectivity is essential for various tasks, including browsing the web, accessing online services, and transferring data. While Wi-Fi is commonly used for wireless connectivity, Ethernet connections offer advantages such as faster speeds, more reliable connections, and lower latency, making them preferred for certain applications.
This guide aims to provide a comprehensive overview of how to connect an Ethernet cable to your laptop. Whether you’re a student, professional, or home user, understanding how to utilize Ethernet connectivity can enhance your computing experience and improve network performance.
Importance of Ethernet Connectivity: Ethernet connectivity offers several benefits over Wi-Fi, including faster and more stable internet connections, lower latency for online gaming and video streaming, and enhanced security for sensitive data transmission. By connecting your laptop to Ethernet, you can enjoy these advantages and optimize your network performance.
Purpose of the Guide: The purpose of this guide is to provide clear and concise instructions on how to connect an Ethernet cable to your laptop. Whether you’re connecting to a home network, office network, or public Ethernet port, this guide will walk you through the process step by step, ensuring a seamless and hassle-free connection experience.
In the following sections, we will cover the types of Ethernet cables, how to prepare your laptop for Ethernet connectivity, step-by-step instructions for connecting the Ethernet cable, configuring network settings, testing the connection, and additional tips and considerations. By following the instructions outlined in this guide, you can successfully connect your laptop to Ethernet and enjoy the benefits of fast and reliable internet connectivity.
Understanding Ethernet Cables
Ethernet cables are the physical medium used to connect devices to a local area network (LAN) or wide area network (WAN) for data transmission. They come in various types and categories, each serving specific purposes and offering different performance capabilities. Understanding the different types of Ethernet cables is essential for selecting the appropriate cable for your networking needs. Below are the key aspects of Ethernet cables:
- Types of Ethernet Cables:
- Twisted Pair Cables: Twisted pair cables are the most common type of Ethernet cables and consist of pairs of insulated copper wires twisted together. They are typically used for Ethernet networking and come in two main categories:
- Unshielded Twisted Pair (UTP): UTP cables are widely used for Ethernet connections in homes, offices, and data centers. They are cost-effective and offer good performance in most environments.
- Shielded Twisted Pair (STP): STP cables have additional shielding to protect against electromagnetic interference (EMI) and radio frequency interference (RFI). They are commonly used in industrial or high-noise environments where EMI/RFI interference is a concern.
- Fiber Optic Cables: Fiber optic cables use light signals to transmit data instead of electrical signals used in twisted pair cables. They offer higher bandwidth and longer transmission distances but are generally more expensive than twisted pair cables. Fiber optic cables are commonly used in high-speed networking applications and long-distance connections.
- Twisted Pair Cables: Twisted pair cables are the most common type of Ethernet cables and consist of pairs of insulated copper wires twisted together. They are typically used for Ethernet networking and come in two main categories:
- Ethernet Cable Categories:
- Ethernet cables are categorized based on their performance characteristics and specifications. The most commonly used Ethernet cable categories include:
- Category 5e (Cat5e): Cat5e cables support speeds up to 1 Gigabit per second (Gbps) and are suitable for most residential and small business networks.
- Category 6 (Cat6): Cat6 cables offer higher performance than Cat5e cables, supporting speeds up to 10 Gbps over shorter distances. They are commonly used in larger networks and environments with higher bandwidth requirements.
- Category 6a (Cat6a): Cat6a cables are an enhanced version of Cat6 cables, supporting speeds up to 10 Gbps over longer distances and with better noise immunity. They are suitable for high-performance networking applications and environments with demanding bandwidth requirements.
- Category 7 (Cat7): Cat7 cables are designed to support even higher speeds and frequencies than Cat6a cables, making them suitable for future-proofing network installations. They feature shielding for improved performance and are less susceptible to interference.
- Ethernet cables are categorized based on their performance characteristics and specifications. The most commonly used Ethernet cable categories include:
- Cable Length and Compatibility:
- Ethernet cables come in various lengths, ranging from a few feet to hundreds of feet. It’s essential to choose the appropriate cable length based on the distance between your devices and the network infrastructure.
- Additionally, ensure that the Ethernet cable you select is compatible with the networking equipment and standards used in your network. For example, if your network infrastructure supports Gigabit Ethernet, make sure to use Cat5e or higher category cables capable of supporting Gigabit speeds.
By understanding the different types and categories of Ethernet cables, you can make informed decisions when selecting cables for your networking needs. Whether setting up a home network, office network, or data center infrastructure, choosing the right Ethernet cables is crucial for ensuring reliable and high-performance connectivity.
Preparing Your Laptop
Before connecting an Ethernet cable to your laptop, it’s essential to ensure that your laptop is equipped with the necessary hardware and software support for Ethernet connectivity. Here are the steps to prepare your laptop:
- Check for Ethernet Port:
- Most laptops come with built-in Ethernet ports, also known as LAN ports or RJ45 ports, for connecting to wired networks. Look for a small rectangular port on the side or back of your laptop that resembles a larger version of a phone jack. This port is typically labeled with an “Ethernet” or “LAN” icon.
- Determine Ethernet Compatibility:
- If your laptop does not have a built-in Ethernet port, check if it supports Ethernet connectivity through alternative means, such as a USB-to-Ethernet adapter or a docking station with Ethernet connectivity. Many laptops support these options to enable wired networking capabilities.
- Install Ethernet Drivers (if necessary):
- In most cases, modern operating systems such as Windows, macOS, and Linux include built-in drivers for Ethernet connectivity, and no additional installation is required. However, if your laptop’s Ethernet port or adapter requires specific drivers, ensure that they are installed and up to date. You can usually download the drivers from the manufacturer’s website or use the automatic driver update feature in your operating system.
- Check Network Settings:
- Before connecting the Ethernet cable, check your laptop’s network settings to ensure that Ethernet connectivity is enabled and configured correctly. In Windows, you can access network settings by going to Control Panel > Network and Internet > Network and Sharing Center. In macOS, network settings can be found in System Preferences > Network.
- Prepare the Ethernet Cable:
- If you haven’t already done so, unwind and straighten the Ethernet cable to prevent any kinks or bends that may affect performance. Inspect the cable for any visible damage, such as cuts or frayed wires, and replace it if necessary.
By following these steps to prepare your laptop for Ethernet connectivity, you can ensure a smooth and successful connection to a wired network. Once your laptop is ready, you can proceed to connect the Ethernet cable and enjoy the benefits of fast and reliable internet connectivity for your computing needs.
Connecting the Ethernet Cable
Once you’ve prepared your laptop for Ethernet connectivity, you can proceed to connect the Ethernet cable. Follow these steps to ensure a proper connection:
- Locate the Ethernet Port on Your Laptop:
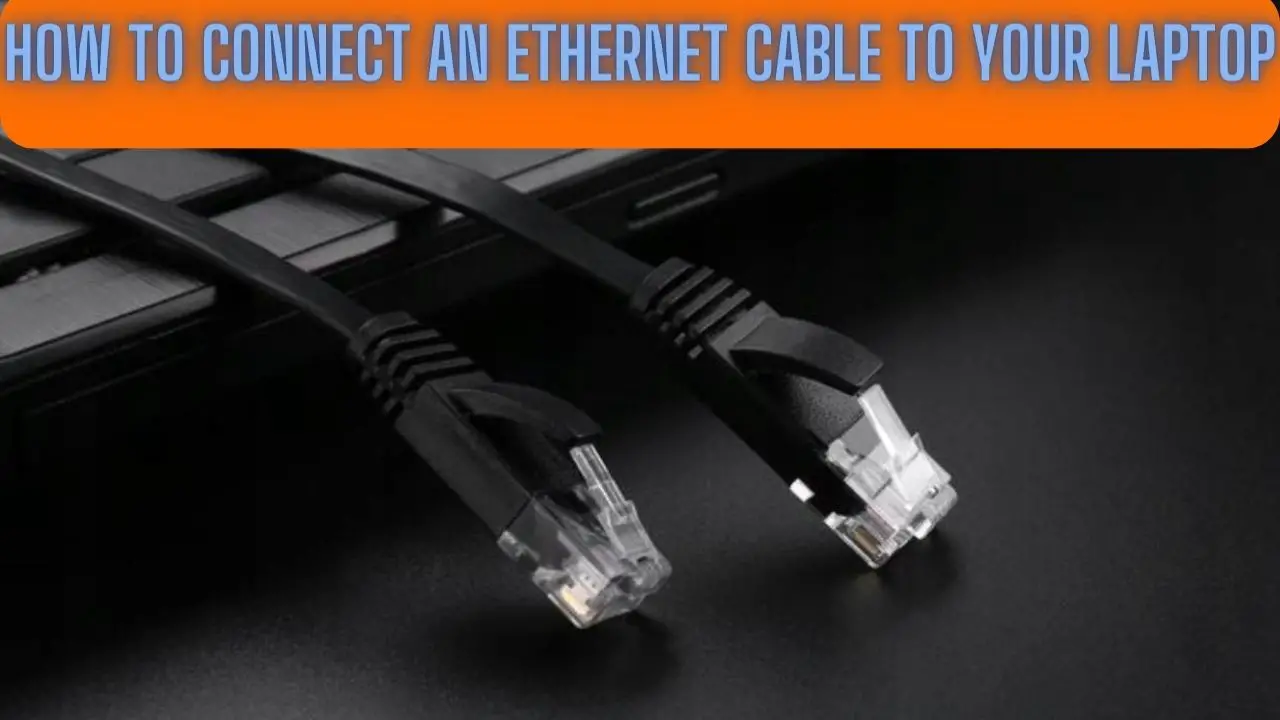
- Look for the Ethernet port on your laptop. It is typically located on the side or back of the laptop, near other ports such as USB ports, HDMI ports, and power jacks. The Ethernet port is rectangular in shape and has a small opening that resembles a larger version of a phone jack.
- Inspect the Ethernet Cable:
- Before connecting the cable, inspect it for any visible damage, such as cuts, frayed wires, or bent connectors. Using a damaged cable can affect performance and lead to unreliable connections. If the cable appears to be damaged, replace it with a new one.
- Insert the Ethernet Cable into the Ethernet Port:
- Hold the Ethernet cable by the connector and align it with the Ethernet port on your laptop. The connector has a tab that should align with the opening of the Ethernet port. Insert the connector into the port firmly but gently until you feel it click into place. Ensure that the connector is fully inserted to establish a secure connection.
- Secure the Connection:
- Once the cable is inserted into the Ethernet port, you may hear or feel a click indicating that it is securely connected. Gently tug on the cable to ensure that it is firmly seated in the port and does not come loose. Avoid applying excessive force when inserting or removing the cable to prevent damage to the port or cable.
- Verify Connection Status:
- After connecting the Ethernet cable, check the network status on your laptop to verify that the connection is active. Look for the network icon in the system tray (Windows) or menu bar (macOS) and ensure that it indicates a successful Ethernet connection. You may also check the network settings to confirm the connection status and view details such as IP address and network speed.
By following these steps, you can successfully connect the Ethernet cable to your laptop and establish a wired network connection. Wired Ethernet connections offer fast and reliable internet connectivity, making them ideal for tasks that require high-speed data transfer and low latency, such as online gaming, video streaming, and large file downloads.
Configuring Network Settings (Optional)
While many modern operating systems automatically detect and configure network settings when you connect an Ethernet cable, you may need to manually adjust network settings in certain situations. Here’s how to configure network settings on your laptop if necessary:
- Access Network Settings:
- In Windows:
- Go to Control Panel > Network and Internet > Network and Sharing Center.
- Click on “Change adapter settings” in the left-hand sidebar.
- Right-click on the Ethernet connection and select “Properties.”
- In macOS:
- Go to System Preferences > Network.
- Select “Ethernet” from the list of network connections on the left.
- In Windows:
- Configure IP Address Settings:
- By default, most networks use dynamic IP addressing (DHCP), where the IP address is automatically assigned to your laptop by the network router. If you need to configure a static IP address:
- In Windows:
- Select “Internet Protocol Version 4 (TCP/IPv4)” and click on the “Properties” button.
- Select “Use the following IP address” and enter the desired IP address, subnet mask, and default gateway.
- In macOS:
- Select “Manually” from the “Configure IPv4” dropdown menu.
- Enter the desired IP address, subnet mask, router (gateway), and DNS server addresses.
- In Windows:
- By default, most networks use dynamic IP addressing (DHCP), where the IP address is automatically assigned to your laptop by the network router. If you need to configure a static IP address:
- Set Up Network Preferences:
- Depending on your network configuration, you may need to adjust additional network preferences:
- In Windows:
- You can configure DNS server settings, WINS settings, and advanced TCP/IP settings under the “Internet Protocol Version 4 (TCP/IPv4)” properties.
- In macOS:
- You can configure advanced network settings, proxy settings, and other options by clicking the “Advanced” button in the network settings window.
- In Windows:
- Depending on your network configuration, you may need to adjust additional network preferences:
- Save and Apply Changes:
- After making changes to the network settings, click the “OK” or “Apply” button to save your changes and close the network settings window. Your laptop will apply the new network settings, and you should now be connected to the network with the configured settings.
- Test the Connection:
- To ensure that your laptop is properly configured and connected to the network, open a web browser and try accessing a website. If the website loads successfully, it indicates that your network connection is working correctly with the configured settings.
- Revert to Automatic Settings (if necessary):
- If you encounter issues with manually configured network settings, you can revert to automatic (DHCP) settings:
- In Windows:
- Select “Obtain an IP address automatically” and “Obtain DNS server address automatically” in the “Internet Protocol Version 4 (TCP/IPv4)” properties.
- In macOS:
- Select “Using DHCP” from the “Configure IPv4” dropdown menu.
- In Windows:
- If you encounter issues with manually configured network settings, you can revert to automatic (DHCP) settings:
By following these steps, you can configure network settings on your laptop as needed to ensure compatibility with your network environment. Adjusting network settings may be necessary in certain situations, such as connecting to a network with specific IP address requirements or troubleshooting network connectivity issues.
Testing the Connection
After connecting your laptop to the network using an Ethernet cable and configuring network settings if necessary, it’s important to test the connection to ensure that everything is working correctly. Here’s how to test the connection:
- Check Network Status Icon:
- Look for the network status icon in the system tray (Windows) or menu bar (macOS) of your laptop. The icon usually resembles a computer monitor or network signal bars. If the icon indicates that you are connected to a network (usually with a checkmark or signal strength indicator), it suggests that the Ethernet connection is active.
- Open a Web Browser:
- Launch a web browser on your laptop, such as Google Chrome, Mozilla Firefox, Microsoft Edge, or Safari. Attempt to access a website by typing its URL into the address bar (e.g., www.google.com) and pressing Enter.
- Test Internet Connectivity:
- If the website loads successfully and you can browse the internet without any issues, it indicates that your Ethernet connection is working correctly, and you have internet connectivity.
- Ping Test (Optional):
- For a more comprehensive test of network connectivity, you can use the ping command to send ICMP echo request packets to a specific IP address or domain name and measure the response time. Open the command prompt (Windows) or terminal (macOS) and type the following command:
ping www.google.com - Press Enter to execute the command. If you receive responses from the specified IP address, it indicates that your laptop is able to communicate with the remote server (in this case, Google’s web server) over the network.
- For a more comprehensive test of network connectivity, you can use the ping command to send ICMP echo request packets to a specific IP address or domain name and measure the response time. Open the command prompt (Windows) or terminal (macOS) and type the following command:
- Check Network Settings (Optional):
- If you encounter any issues during testing, double-check the network settings on your laptop to ensure that they are configured correctly. Verify that the IP address, subnet mask, default gateway, and DNS server addresses are accurate and match the network configuration.
- Troubleshoot Connection Issues (if necessary):
- If you are unable to establish a connection or encounter errors while testing, troubleshoot the connection by checking the Ethernet cable, restarting your laptop and network equipment, updating network drivers, and verifying network configuration settings.
- Contact Network Administrator or Internet Service Provider (ISP):
- If you continue to experience connectivity issues despite troubleshooting, contact your network administrator or ISP for assistance. They can help diagnose and resolve network problems, such as issues with network infrastructure, router configuration, or internet service.
By testing the connection using the methods outlined above, you can verify that your laptop is successfully connected to the network via Ethernet and has internet connectivity. Ensuring a reliable network connection is essential for seamless browsing, online communication, and data transfer, enhancing your overall computing experience.
Disconnecting the Ethernet Cable
Once you’ve finished using the Ethernet connection or need to move your laptop, it’s essential to disconnect the Ethernet cable properly to avoid damaging the cable or port. Here’s how to safely disconnect the Ethernet cable:
- Save and Close Applications:
- Before disconnecting the Ethernet cable, save any work and close applications that may be using the network connection. This ensures that no data is lost due to the interruption of the network connection.
- Locate the Ethernet Cable:
- Find the end of the Ethernet cable that is connected to your laptop. It is typically the end with the connector that resembles a larger version of a phone jack.
- Gently Remove the Cable:
- Grasp the connector firmly but gently and pull it straight out of the Ethernet port on your laptop. Avoid twisting or bending the cable excessively as you remove it to prevent damage to the cable or port.
- Inspect the Cable and Port:
- After disconnecting the cable, inspect both the cable and the Ethernet port on your laptop for any signs of damage or wear. Check for bent pins, frayed wires, or other visible issues that may affect future connections.
- Wrap and Store the Cable:
- Once disconnected, carefully coil the Ethernet cable to prevent tangling and store it in a safe place, such as a cable organizer or laptop bag. Avoid bending the cable sharply or placing heavy objects on it to maintain its integrity.
- Restart Network Applications (if necessary):
- If you plan to continue using your laptop without the Ethernet connection, you may need to restart network-dependent applications or services to switch back to wireless connectivity or other network interfaces.
By following these steps, you can safely disconnect the Ethernet cable from your laptop without causing damage to the cable or port. Properly disconnecting the cable ensures that you can use it again in the future and maintain a reliable network connection for your laptop.
Additional Tips and Considerations
- Use Quality Ethernet Cables: Invest in high-quality Ethernet cables to ensure reliable data transmission and durability. While cheaper cables may work initially, they are more prone to signal interference and may degrade over time.
- Avoid Cable Damage: Be careful not to bend, twist, or pull Ethernet cables excessively, as this can damage the cables and affect performance. Use cable organizers or cable management solutions to keep cables organized and prevent tangling.
- Secure Cables Properly: When routing Ethernet cables, secure them along walls, baseboards, or cable trays using cable clips or adhesive cable ties. Avoid running cables across walkways or areas where they can be tripped over.
- Label Cables: Labeling Ethernet cables can help identify them easily, especially in complex network setups with multiple cables. Use color-coded labels or cable tags to distinguish between different cables and connections.
- Test Cable Lengths: When installing Ethernet cables, test the length of the cable runs to ensure they meet the required distance without exceeding maximum cable length specifications. Longer cable runs can lead to signal degradation and slower network speeds.
- Update Firmware and Drivers: Periodically check for firmware updates for your laptop’s Ethernet port and drivers for your network adapter. Updated firmware and drivers can improve compatibility, performance, and security of Ethernet connectivity.
- Monitor Network Performance: Use network monitoring tools to monitor network performance, detect network issues, and troubleshoot connectivity problems. These tools can help identify bandwidth bottlenecks, network congestion, and other issues affecting network performance.
- Consider Network Security: Enable built-in security features such as firewalls, encryption, and network access controls to protect your laptop and network from unauthorized access and security threats. Avoid connecting to unsecured or unknown networks to prevent security risks.
- Backup Network Settings: If you make changes to network settings, such as configuring static IP addresses, consider backing up the settings or taking note of the configurations for future reference. This can help restore network settings in case of configuration errors or system resets.
- Regular Maintenance: Periodically inspect Ethernet cables, connectors, and ports for signs of wear or damage. Clean connectors and ports using compressed air or electronic cleaning solutions to remove dust and debris that can affect connectivity.
By following these additional tips and considerations, you can ensure optimal Ethernet connectivity for your laptop and maintain a reliable network connection for your computing needs. Proper cable management, network security measures, and regular maintenance are essential for maximizing network performance and minimizing downtime.
Frequently Asked Questions (FAQs) about Connecting Your Laptop to Ethernet
- Why should I use Ethernet instead of Wi-Fi on my laptop?
- Ethernet connections typically offer faster speeds, lower latency, and more reliable connections compared to Wi-Fi, making them ideal for tasks that require high-speed data transfer and low latency, such as online gaming, video streaming, and large file downloads.
- Can I connect multiple devices to Ethernet using a switch or router?
- Yes, you can connect multiple devices to Ethernet using a network switch or router. These devices allow you to create a wired network by connecting multiple Ethernet-enabled devices to a central network hub.
- What should I do if my laptop doesn’t have an Ethernet port?
- If your laptop doesn’t have a built-in Ethernet port, you can use a USB-to-Ethernet adapter or a docking station with Ethernet connectivity to enable wired networking capabilities. These adapters typically plug into a USB port on your laptop and provide an Ethernet port for connecting to a wired network.
- How do I know if my laptop is connected to Ethernet?
- You can check the network status icon in the system tray (Windows) or menu bar (macOS) of your laptop to see if you are connected to Ethernet. The network icon usually resembles a computer monitor or network signal bars and indicates whether you are connected to a network.
- Can I use Ethernet and Wi-Fi simultaneously on my laptop?
- Yes, most laptops allow you to use Ethernet and Wi-Fi simultaneously. This can be useful for scenarios where you want to connect to multiple networks simultaneously or achieve faster internet speeds by combining the bandwidth of both connections.
- How do I troubleshoot Ethernet connectivity issues on my laptop?
- If you encounter Ethernet connectivity issues, you can troubleshoot them by checking the physical connection of the Ethernet cable, restarting your laptop and network equipment, updating network drivers, and verifying network configuration settings. If the issue persists, you can contact your network administrator or internet service provider (ISP) for assistance.
- What is the maximum length of an Ethernet cable I can use?
- The maximum length of an Ethernet cable depends on the category of the cable and the network standards being used. For most Ethernet installations, the maximum cable length is 100 meters (328 feet) for twisted pair cables (e.g., Cat5e, Cat6). Beyond this distance, signal degradation may occur.
- Is Ethernet more secure than Wi-Fi?
- Ethernet connections are generally considered more secure than Wi-Fi connections because they are harder to intercept and are not susceptible to wireless eavesdropping or unauthorized access. However, both Ethernet and Wi-Fi connections can be secured using encryption and network security protocols to protect against unauthorized access and data breaches.
These FAQs address common questions and concerns related to connecting your laptop to Ethernet, providing useful information for users seeking to leverage the benefits of wired networking for their computing needs.
Conclusion
In conclusion, Ethernet connectivity remains a vital aspect of modern computing, offering fast, reliable, and secure network connections for laptops and other devices. By following the steps outlined in this guide, users can effectively connect their laptops to Ethernet networks, configure network settings, and ensure a seamless computing experience.
Starting with an understanding of Ethernet cables and their types, users can select the appropriate cable for their networking needs. Preparing the laptop involves checking for Ethernet port availability, ensuring compatibility, and installing necessary drivers or adapters. Connecting the Ethernet cable requires proper handling to avoid damage and ensure a secure connection.
Optional steps, such as configuring network settings, allow users to tailor their network setup to specific requirements, while testing the connection ensures that everything is functioning correctly. Properly disconnecting the Ethernet cable and considering additional tips for Ethernet connectivity help maintain network reliability and performance over time.
In today’s interconnected world, where internet speed and reliability are crucial for productivity and communication, Ethernet connectivity offers a dependable solution for users seeking fast and stable network connections. Whether for work, study, or leisure, having a reliable Ethernet connection can enhance the overall computing experience and facilitate seamless access to online resources and services.
By following the guidelines provided in this guide and implementing best practices for Ethernet connectivity, users can leverage the benefits of wired networking and enjoy efficient and uninterrupted access to the internet and network resources from their laptops. As technology continues to evolve, Ethernet remains a cornerstone of network connectivity, providing a robust foundation for modern computing needs.